
Deciding to renovate a room yourself can be great in so many ways! It can feel amazing when you’ve accomplished something yourself, you could teach yourself a new skill or it can give you a fresh start. However selecting a project before thinking carefully about what it involves can leave you feeling irritated and out of pocket. Some projects are simply just too dangerous to tackle alone.
So before you start any renovation you need to ponder a few things…
Can you afford the time and effort to renovate the room/element?
By completing it yourself is it going to save to money?
What skills/tools do you need to renovate to the standard you want?
So you are aware of the pit falls and you’re still determined – Fab – but how do we get started?
As a beginner to DIY, who has dreams of the things they want to renovate, our advice would be to start small; test your skills first. You could, for example, build a raised bed before you commence decking your back garden. Feel you are a bit more experienced? The why not try completing DIY on only part of a project. For example you may hire a contractor to refit a bath and shower set but you may complete the small fittings and tiling yourself.
Start small…
Upgrading a room doesn’t always mean a complete overhaul. Often changing an element of the room can have just as much impact.
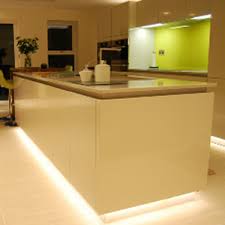
Why not try to renovate your kitchen lighting?
- First you will need to decide what role your lighting plays. Is it accent lighting or task lighting? Once you have decided you can then select the correct LED strip with the correct level of brightness for your requirements. We would actually recommend that you select a strip with a brighter light that you need and fit an additional dimmer so that you can adjust as needed.
- Collect the tools and equipment you need…
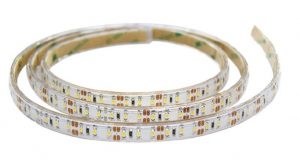 Reels of strip lighting (you will need to measure how much you need for your project)

Strip-to-strip “no wire” solderless connector
Power Supply – Flexifire have created a help guide to help you choose the correct power supply.
Measuring tape
Wire strippers
Sharp scissors
wire nuts
Black electrical tape
- Measure the length the surface you wish to attach lighting to. Then cut the lighting according to this measurement. LED strips can only be cut at specific points. Read the instructions to see how these points are indicated. Then use sharp scissors to cut the correct length needed.
- Prepare the strip-to-power connection by attaching the first section of lights to the dimmer and the power supply. To do this you will need to add low voltage extension wire. Cut the low voltage wire to length before stripping approximately an inch of insulation from the end
- Of the LED strip and the end of the extension wire. Wrap the exposed wires of the positive/negative cables together and secure using wire nuts.
- If you need to connect two separate strips of LED (without a corner) you can use a ‘no-wire’ connector. To do this you need to cut the LED strip at a signposted point. Peel back the cover and clip the exposed piece into the strip to strip ‘no wire’ connector. Repeat with the other side of the connector and the second LED strip. It is important to ensure that when in place the positive and negative sides of the strips are aligned.
Once you have made all the connections you need to it is a good time to test the lighting. You can do this using a 2 way terminal or temporarily connect wire nuts to the LED strip and test using the power supply. If everything is connected correctly the LED’s will come on at full brightness. If they are dimmer than expected, check that the connections are secure.
- Now your strip is ready to install under the counter of your choice. Prior to installing, wipe the surface down and remove any residue (if the surface you are connecting to is rough you may need to use an additional adhesive). When the surface is clean, peel back the adhesive backing on the LED strip and run the strip in a straight under the counter you have chosen.
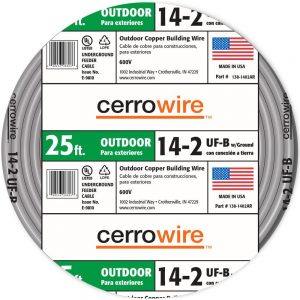
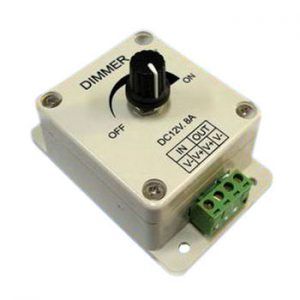
- If you have chosen to use a dimmer, this would be the point at which you’d install it. Mount the dimmer to the wall – we use the command strips as they are easy to replace and are quick and stress-free to install but you can use alternatives. Then disconnect the power supply. Once disconnected you can wire the dimmer to the power supply by inserting the negative wire into the slot marked – and the red wire into the slot marked + at the bottom of the dimmer on the right hand side (this side will be marked ‘in’). Then wire the low voltage cerrowire into the left side of the dimmer (this will be labelled out). Finally secure the wires using a screwdriver.
- Finally, plug in the power supply and adjust the dimmer to the level you wish.
- Stand back and admire your handy work! J
Now you have an insight into how long a renovation may take, how far your skills will take you and how much you enjoy the hands on approach so you can plan further endeavours.
Happy renovating!